Building the perfect CRM using Podio
Please Note: This tutorial is a little out of date. PodioMail has become a lot more powerful and a lot easier to set up since this was published. Go back to the Blog for active posts.
This tutorial will take us step-by-step through building the perfect CRM or sales leads management system using Podio and PodioMail.

Podio is a work collaboration platform that allows you to create custom apps to manage just about every aspect of your business. If you don't already have an account, sign up for a free account here.
The App principle in Podio is quite straight forward. You simply define the fields you need to track, and Podio lets you do it. There are also hundreds of pre-built (free) apps in the marketplace that you can install on your workspaces.
Building a simple CRM App
There are many Sales Tracking apps in the Podio marketplace ready to install, but in my experience, you'll have a better understanding and ability to expand your apps if you build them yourself.
1 - Click on the "Add App" icon and select "Go to the App Builder" under "Build Your Own App"
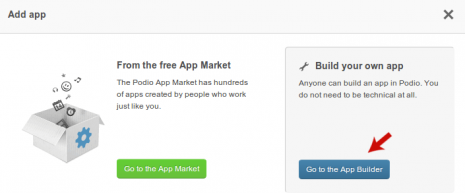
2 - Give your app a name "Leads" and name the individual items that will be in the app "Lead". Optionally you can also select an icon for the app.

3 - Create the Company Name field

This field should be marked as required.
Note: Contact fields in Podio do have a company field associated with them, but for the purpose of a CRM it is beneficial to have the company name as a separate field because it's very important in lead tracking.
4 - Create a new Contact field for customer contact info

This field should be set for Workspace contacts (not members) as they are external people. It should also be a required field.
5 - Create a new Number field for expected value

It's important in sales to have a rough gauge on what each lead could convert to in a sale. This is especially important for later reporting when you need to see the approximate value of new business in your pipeline.
6 - Create a new Category field for status

The status field will allow you to easily filter your views and reports later. You may not want to use the exact same status categories that I have here. These are a generalization and cover the most common lead statuses.
7 - Create a new Text field for details

The details field should be set as a "Large text area" because it will contain many lines of text.
8 - Scroll to the bottom and click on "Save app"
That's it. You now have a Leads App that you can use to track your sales enquiries and leads.
Filter your CRM Dashboard View
Now that we have a Leads App to track our sales leads, let's customize the view to make day-to-day life a little easier. For demonstration purposes I have entered some dummy data.
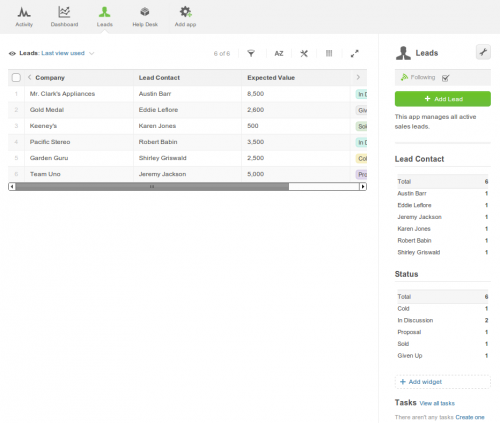
The first thing we want to do is get irrelevant leads out of the display, and order them by last activity.
1 - Click on the "Filters" icon
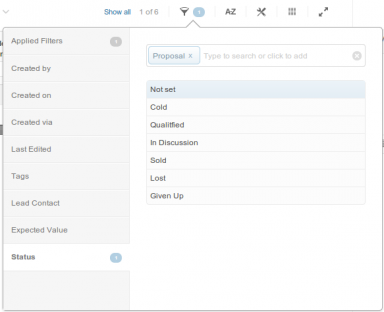
2 - Select "Status" on the left, and then add all active statuses
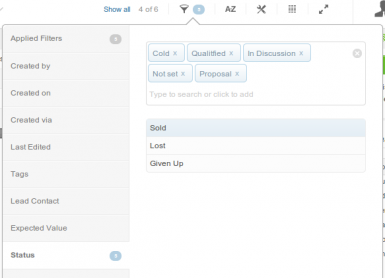
Since we're not interested in non-active leads, we'll not include statuses like sold or lost. Do make sure though that you do include "Not Set" in the filter since new items will not have this value set if they were created externally.
3 - Click on the "Sorting" icon
4 - Select "Last activity, newest first"
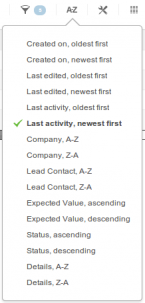
This will sort our leads by latest activity. The leads at the top have had the most recent actions, whereas the ones at the bottom have not been updated for a while.
5 - Click on the "Options" icon
6 - Unselect the "Details" column
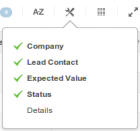
If you added any additional fields to your app when you created it, you can remove them from the main list display as well. Only the most important fields should be shown so that you can get a good overview of your sales funnel with a quick glance.
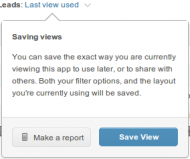
7 - Click on the little down arrow next to "Last view used" and click on the "Save View" button
8 - Name the view "Active Leads" and click "Save"
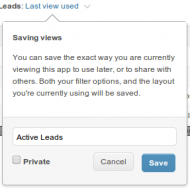
You can now simply select this view from the views drop-down at any time to get this set of filters and options applied to the leads list.
With this view, you now have a great overview of your sales leads.
Add informative Widgets
Although the main Leads screen now gives you a good overview of your sales leads, it would be helpful to know a little more about your sales and leads position. For this we will set up some widgets to act as a dashboard.
For example, it would be very useful to know what the total value of proposals sent in the last 30 days is.
1 - Click on "Add Widget" on the right

2 - Select "Report"
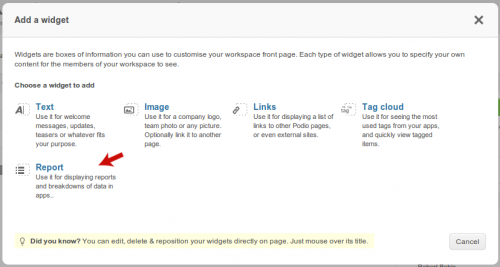
3 - On the top of the list view, select "Sum" of "Expected Value"

4 - Click the Filters icon and remove all statuses except "Proposal"
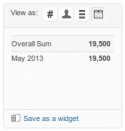
5 - Click on the widget's calendar icon, click "Created On", and choose "Monthly"

6 - Click on "Save as a widget"
7 - Name the widget "Active Proposals" and click "Save"
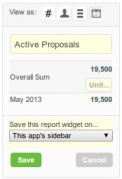
We now have a great Report Widget that shows approximate proposal totals by month.

Similarly, you can create dashboard widgets to show you monthly sales, etc.
Worth noting: these reports are not completely accurate because we've based them on each item's created date. If you want exact reports, you should add fields to your Leads App for "Proposal Date", "Proposal Amount", "Sale Date", and "Final Sales Amount", and then use these fields in the report widgets. I opted not to do this in this tutorial to keep things a little simpler and easy to follow.
Connect your CRM to your Website
Now that you have a CRM app, you can use it to track your sales leads.
If your website has a contact form for prospects to fill in, we can make life easier by using Podio's webforms to integrate your Leads App directly into your website.
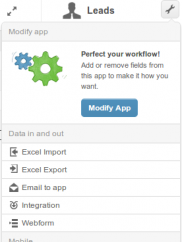
1 - Click on the Wrench icon, and select "Webform"
2 - Add your domain name

Please note: you should add both the www version and non-www version of your domain name to make sure that the form will work on your website.
3 - Choose the app fields for your form

Notice that we only included those fields which we want the prospect to fill out. The rest of the fields are for internal use in your CRM app.
4 - Choose a theme
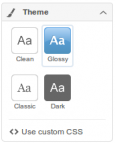
5 - Set the button text

6 - Set the success message
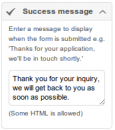
This is the message that the prospect will see after submitting their enquiry.
7 - Click "Save & Share"
8 - Copy the HTML code
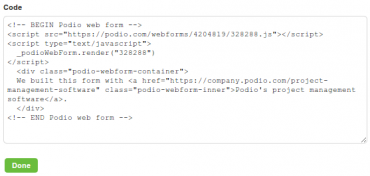
9 - Insert the HTML code in your website
That's it – you're done. Your website now has a form powered by Podio, which prospects can fill in, and it will create a new Lead in your Leads App instantly.
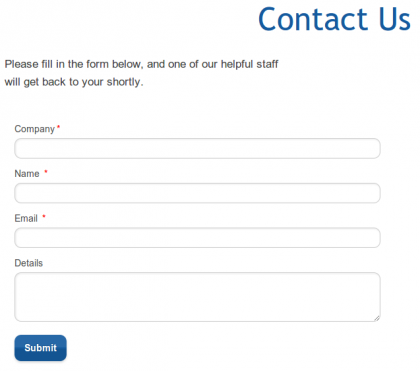
Connect your CRM to an Email Address
Now that prospects can fill in your new lead form directly, you'll save a lot of time capturing info on new leads.
However, what about prospects that send you enquiries via email?
Not a problem. Podio has a great email-to-app function.
1 - Leads enquiry email address
The first thing you'll need to do is create a dedicated email address for sales leads. A good option would be "sales@yourdomain.com". Setting up this email address depends on your hosting control panel. If you require assistance with this, please contact your email hosting provider.
2 - Get the Leads App email address
2a) Click on the Wrench icon and select "Email to app"
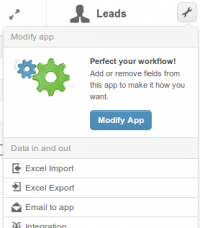
2b) Copy the App's email address

3 - Forward your email
You will need to forward your email from your new sales@ address to the app's email address that you just retrieved from Podio. How to do this will again depend on your hosting control panel, and you should contact your email hosting provider if you require assistance.
Once set up, prospects can now either fill in the leads form on your website, or simply send an email to sales@yourdomain.com.
Both will result in a new Lead being created in your Podio Leads App.
full Email integration with your App
By now, we've created a pretty good CRM system to help manage your sales leads.
However, it may quickly become tiresome to keep each lead up-to-date in Podio. Each time there's a phonecall or email exchange, you have to manually create a status update comment on the Leads App item.
This can involve a lot of copying and pasting, especially when many emails are involved.
Wouldn't it be great if your email conversations with leads would be automatically logged with each lead item in Podio? It can, with PodioMail.
If you don't already have a PodioMail account, set one up now.
Once you have your account, let's get your email integrated with your Podio Leads App.
1 - Go to your App in Podio that you want to hook up to PodioMail
2 - Click on the Wrench Icon and then select Developers
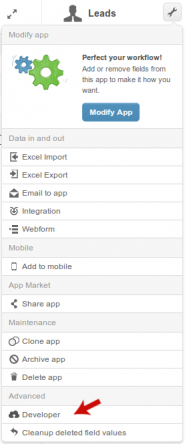
3 - Take note of the App ID and Token
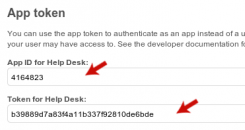
You'll need these later
4 - In PodioMail, click on "Apps", and then "Add an App"

5 - Select an App Code (eg "CRM")
6 - Paste the App ID and Token you copied from Podio in step 3 into the relevant fields in PodioMail and click the "Connect App" button.

7 - Select your Podio App fields for email
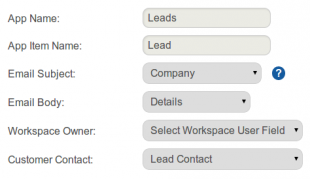
PodioMail automatically retrieves the app name and individual app item name from Podio. You need to select your app fields and map them to email fields.
In our example, we're using the "Company" field as the email subject, "Lead Contact" as the customer, and "Details" for the email body.
Since we didn't have any workspace users in our app, there's no option to map a workspace owner, and this is fine for one person. However, if you have multiple people in your company using the CRM, you should add a workspace user field to your app and call it something like "Lead Owner", and then map it to the workspace owner field.
8 - Set up new lead notifications

Every time a new lead is added to your CRM Podio app, you will receive an email with the details. You can reply to the customer directly from this notification email.
9 - Set up the auto-responder
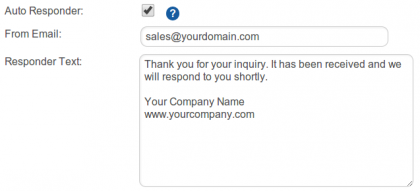
With the auto-responder, every time a prospect fills out your webform on your website or sends you an email to your sales@ address, they will receive an immediate response letting them know that their enquiry has been received.
10 - Click the Save button
11 - Forward your email to PodioMail
This is probably the most important step. In order for PodioMail to add your emails and your prospects' emails to Podio, it needs to get copies of these emails.
If you set up a dedicated sales@ email address earlier, then you can simply forward this account to yourcompanycode@podiomail.com.
On the other hand, if you are using your regular email address, then you should create an email filter to only forward those messages with "[yourcompanycode:yourappcode:" in the subject line to yourcompanycode@podiomail.com
As a last resort, you could forward all your email, but please note that this will count toward your email quota in your PodioMail account.
How to forward your email will again depend on your hosting control panel, and you should contact your email hosting provider if you require assistance.
For more specific step-by-step instructions for forwarding your email on common platforms like Outlook OWA, GMail, Rackspace, and cPanel, click here.
If you have multiple employees using the CRM app and having conversations with prospects, you will need to forward email of all users involved.
Once your email is forwarded, you're all set. You now have the perfect CRM.
See it in Action
Now that we've built your perfect CRM, let's see it in action. We'll go through a typical sales cycle using mostly fictional data for illustration purposes.
Your prospect fills out your lead form on your website
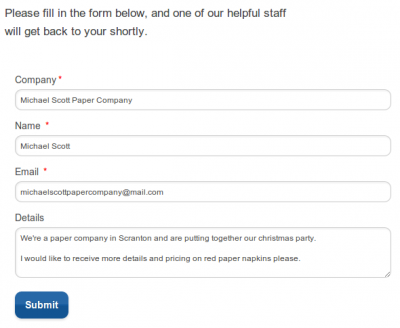
A new lead is immediately created in Podio
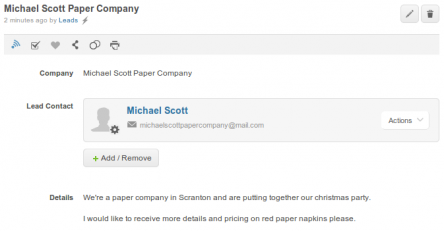
PodioMail adds a comment to the lead immediately, with the item's direct email address, as well as a clickable reply-to email link

And you receive an email notification with the details of the lead
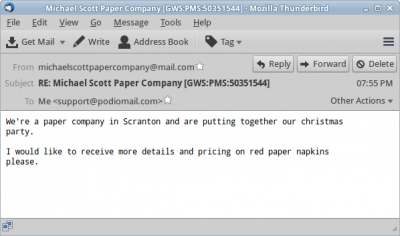
You can reply directly to the prospect from your email notification
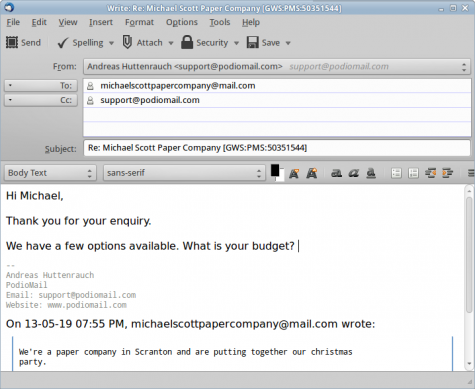
and your email is automatically logged in Podio (because you cc'ed yourself)

Your prospect replies to your email
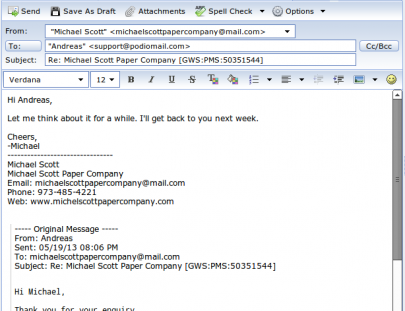
And their reply is instantly added to the lead in Podio
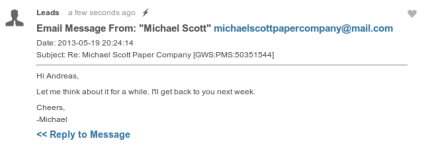
Now let's assume some time has passed. You notice in your Leads App that your prospect never got back to you as promised. Should you now try to find his last email so you can reply to it? Nah! There's an easier way. Simply click the "Reply to Message" link in Podio

and your default email program will start a new email message with the last message history preserved
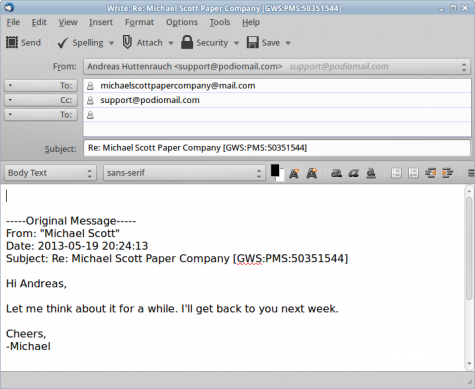
so you can compose your email reply and send it quickly and easily

and of course, your reply is automatically logged in Podio
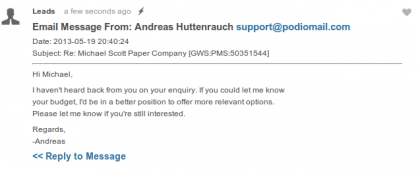
And so on, and so forth. The point is that you and your customers can keep the conversation via email, without you having to perform ANY additional steps to log your communications, while in Podio, you can see a great overview of your sales pipeline, and details and history on each individual lead.

 by
Andreas Huttenrauch
by
Andreas HuttenrauchOwner of Globi Web Solutions, and Podio Fanatic.
comments powered by Disqus
