Sending Beautiful Newsletters from Podio with GlobiFlow and tracking Open Rates with GlobiMail
We often need to send notices to a set of users, and have had this requirement expressed by many of our customers as well. The general consensus requirements for a nice newsletter are:
- Beautiful - each email should look like a work of art. No plain text or over-simplified html
- Personalized - each email should be addressed to a Person
- Read Tracking - we wish to know how many people open/read the email
- Unsubscribe - there should be a mechanism for contacts to unsubscribe from future emails
Spam Disclaimer Warning Notice
Sending unsolicited commercial email or spam is against our terms of service and could get your account(s) disconnected if complaints come in. Do not send spam. Only send email to known contacts that have agreed to receiving them.
2021 UPDATE
We have updated features and you can see some of the changes here: http://help.globimail.com/outbox-for-campaigns.php
The Podio Apps
To properly send and track email newsletters, we're going to need 3 Podio apps:
- Campaigns - to specify the email message, track each email campaign and aggregate statistics
- Outbox - a queue of individual email addresses to be sent
- Unsubscribes - to track unsubscribe requests
Campaigns
This app will hold the meat and statistics for each campaign. The fields required will be:
- Title - single-line text to identify the campaign by name
- Subject - single-line text field to be used as the subject of each email sent
- Body - multi-line text field to contain the HTML message body of each email
- From Name - single-line text for the name the email comes from
- From Address - single-line text for the email address the email comes from
- Sent - number field to track how many emails were sent
- Delivered - number field to track how many emails were delivered
- Opened - number field to track how many emails were read/opened
- Unsubscribed - number field to track how many emails were unsubscribed from
- Reported Spam - number field to track how many emails were reported as spam (hopefully this will always be zero, hint hint)
Beautiful Campaigns
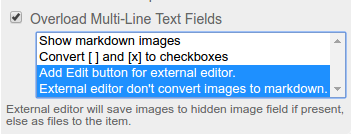
Before you say that Podio multi-line text fields are inadequate for newsletter content, let's just fix that right now. Install the SuperMenu Chrome extension, find your Campaigns app in the tree, and set the overloading option for multi-line text fields in this app, and select both "Add Edit button for external editor" and "External editor don't convert images to markdown".
Now, when you hover over the Body field in this app, you'll get the option to "Edit with Supermenu", which will allow you the full range of HTML abilities, including images.
Personalized Campaigns
Since we want to personalize each email, we're going to have to template the name in some way. I will simply select the token "{{name}}" to be replaced by the name of the contact in each email. Note that this is an internal rule that we decided on - not a technical consideration. You can choose any string you wish.
But, with our choice as it is, we'll now just make sure that each email template will start with a line line "Hi {{name}}", and we'll build this into our sending flow later to do the actual replacement before sending.
Outbox
The Outbox app will hold each email address that you intend to send a campaign to. The required fields will be:
- First Name single-line text field
- Email Address - single-line text field
- Status - category field with "To be Sent", "Sent" and "Refused"
- Campaign - relationship field to the Campaigns app to determine which email template will be used
- Delivered - category field with single option "Delivered" or "Bounced"
- Opened - category field with single option "Opened"
- Unsubscribed - category field with single option "Unsubscribed"
- Reported Spam - category field with single option "Reported Spam"
- itemId - single-line text field to store the Podio item ID for internal searching
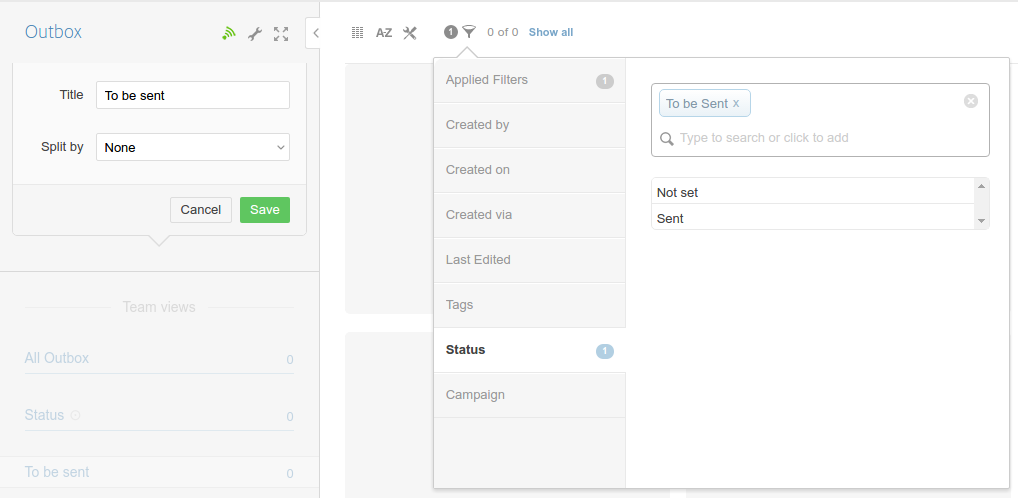
Outbox "to be Sent" View
It is very important to also create a view on the Outbox app to return only items with status "To be Sent" and ordered by Created on, oldest first. This view will be used by our GlobiFlow Flow to select batches of emails to send.
Unsubscribes
The Unsubscribes app is a really simple app to keep email addresses that opted out. The fields required are:
- Email Address - single-line text field
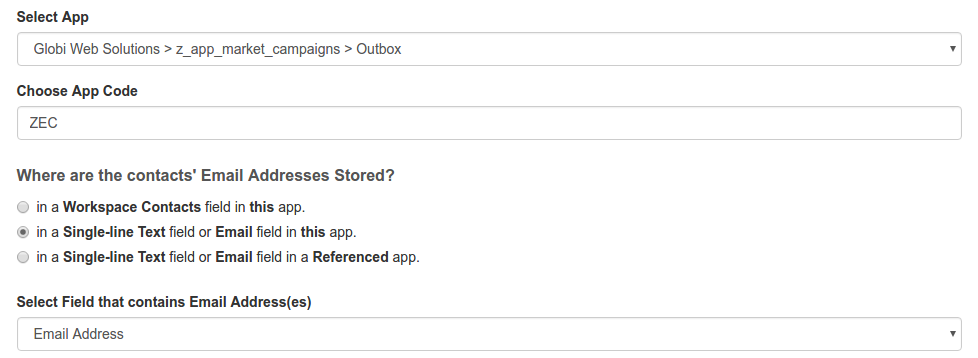
Connect GlobiMail
The next step is to connect the Outbox app to your GlobiMail account. You don't have to do anything fancy with the config. Just add the app, and tell GlobiMail that the email address for each item is in the same app's single-line text field called "Email Address".
To make sure that emails come from your domain, make sure to set up and validate your domain on the Settings page. Here's what my record looks like (it will look different for you, specific to your domain name):

For more details on this process, check out Sending Emails from your Domain.
Handling Unsubscribes
To allow contacts to opt out, we need to create an "External Link" type flow in the Outbox app. The link to this page will be included in each email sent, and when clicked, will include the recipient's email address in the unsubscribed app:
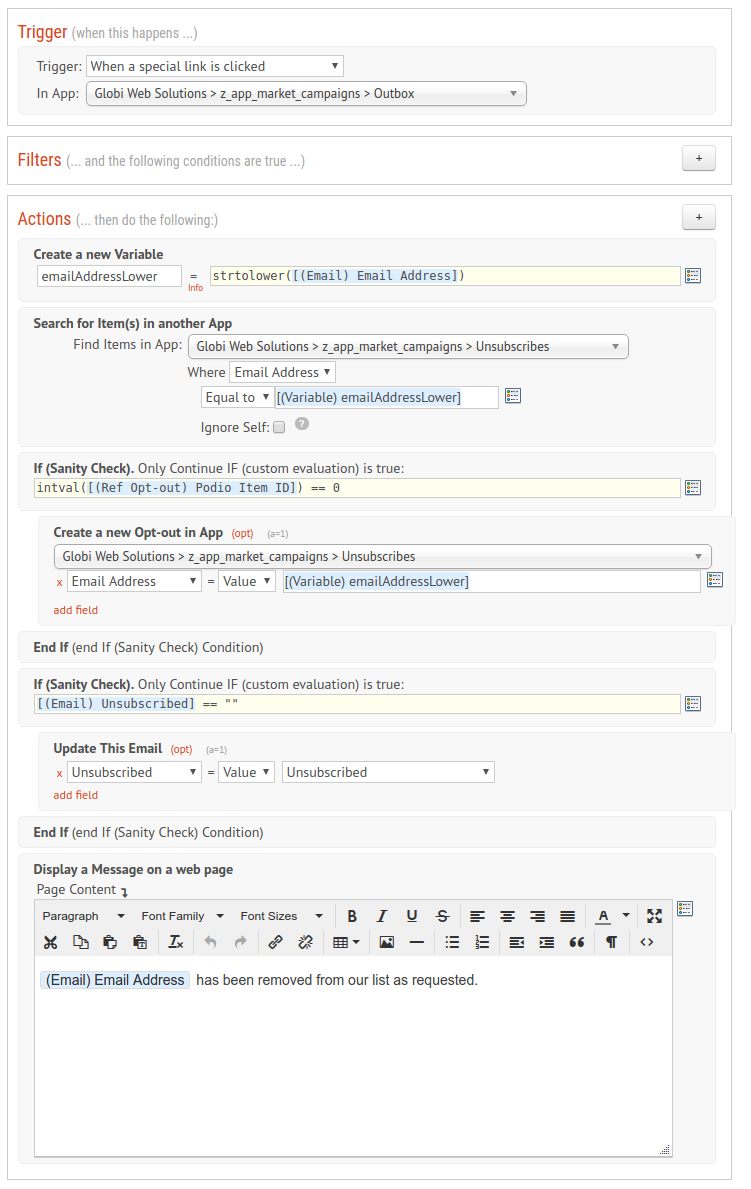
Make sure that the hook event is on for all update actions.
Preparing to handle Email Events
Before we can handle email events, we need to do a little housework. We included a field for "itemId" in the Outbox app to store the Podio item ID, but we need to get values in there. In order to fill that field, we need a little flow on Item Created in Outbox:

Next, we need to create a webhook to handle the events. First thing to do is to create an empty stub webhook:
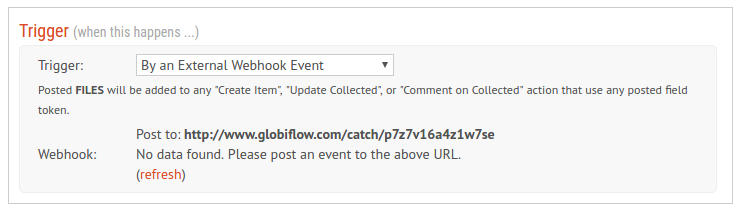
Since there's no data captured by the webhook yet, we can't really build a flow yet. Only once an event has been received will we have the necessary tokens to build our flow.
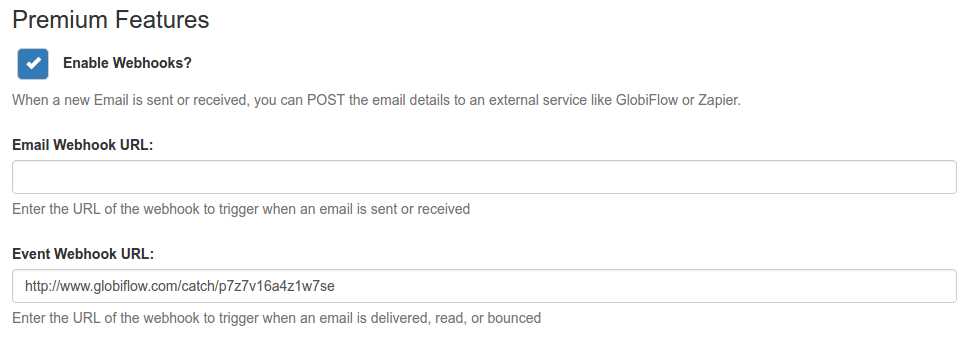
The next step is to add the webhook URL to our App configuration in GlobiMail on the "Premium Features" tab in the "Event Webhook URL" field:
To create some webhook payload, simply create an item in the Outbox app to your own email address, and send an email. Once you receive that email, there will be an event for "delivered" which is enough to build our flows with.
Handling Email Events
Now that we have created some webhook payload, we can continue to build our webhook flow. It needs to find the related item in the Outbox app by searching for "itemId", and then update that item according to the event that was received:

Make sure that the hook event is on for all update actions.
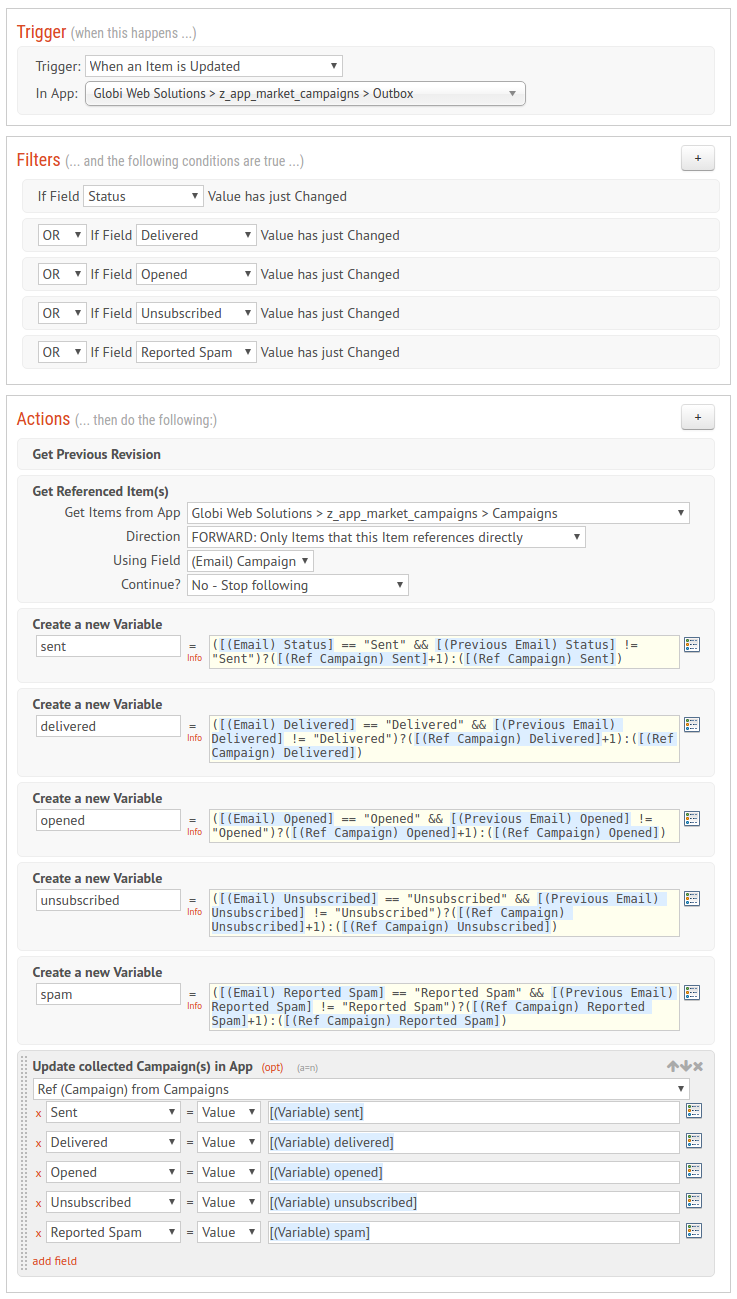
We also need a flow when an email in the Outbox app has a status change to update the statistics of the campaign itself:
Sending Emails Automagically
The next thing we need is a flow to actually send a single email. We'll make this a manual flow in the Outbox app:
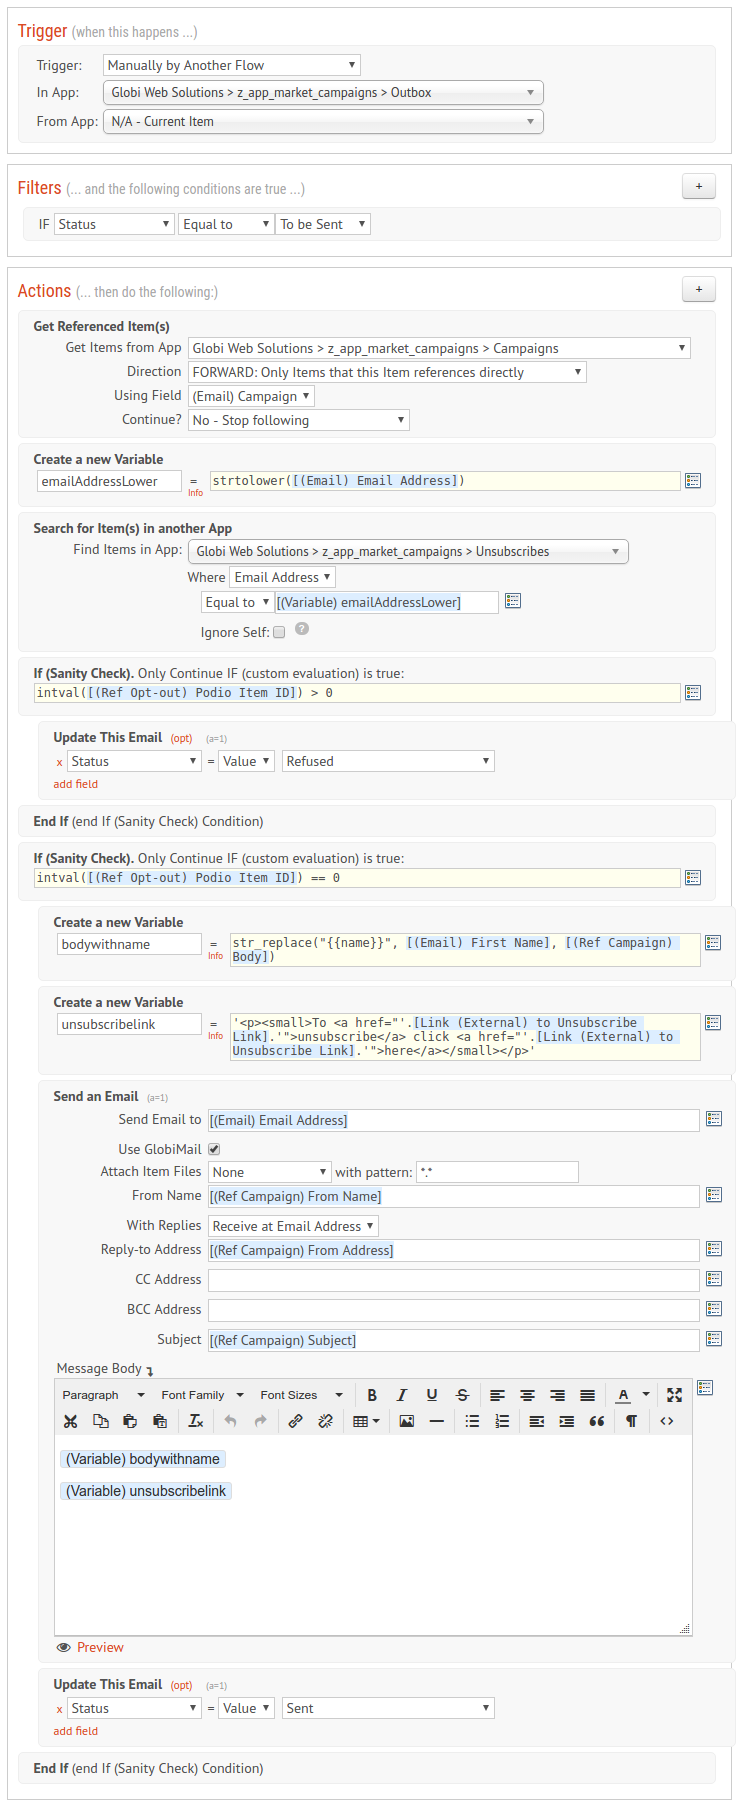
Make sure that you check the box for "Use GlobiMail" in the Send Email action.
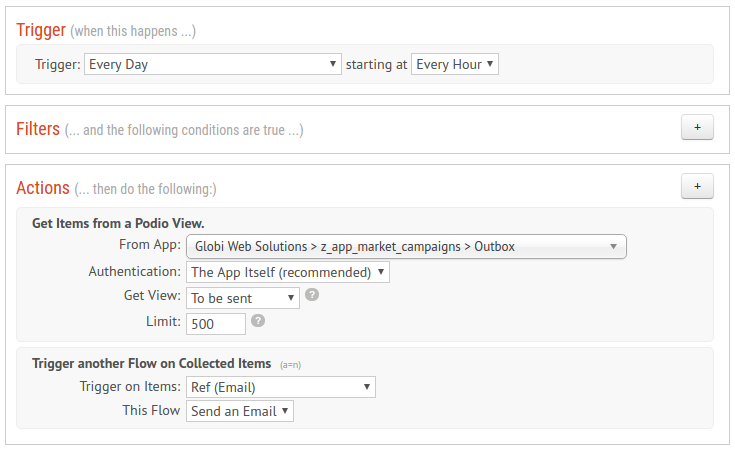
The last thing we need is a timed flow to send out a chunk of emails every hour. It gets the "To be Sent" view from the Outbox app, and limits it's results to something sane. In this example I use 500. The flow then triggers the sending flow on all collected items:
Creating a Campaign
Finally we're getting to the point of using this system.
To create a new email campaign, create a new item in the Campaigns app. Here's a quick example:
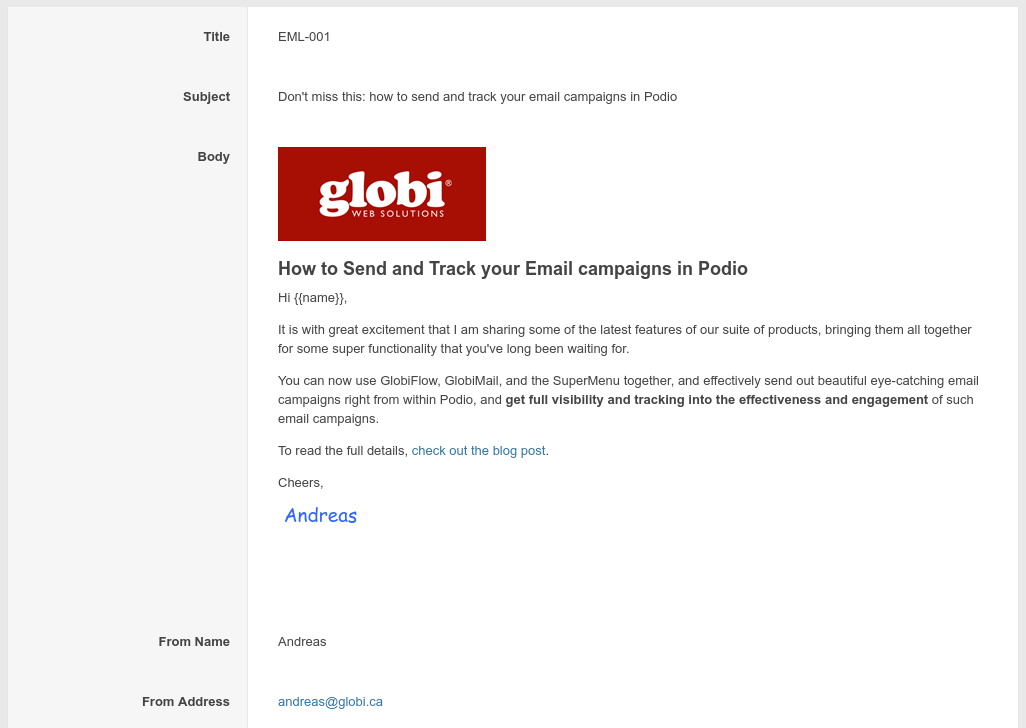
Make sure you use the "Edit with Supermenu" button on hover over the body text so that you can use our full-featured HTML editor with image support.
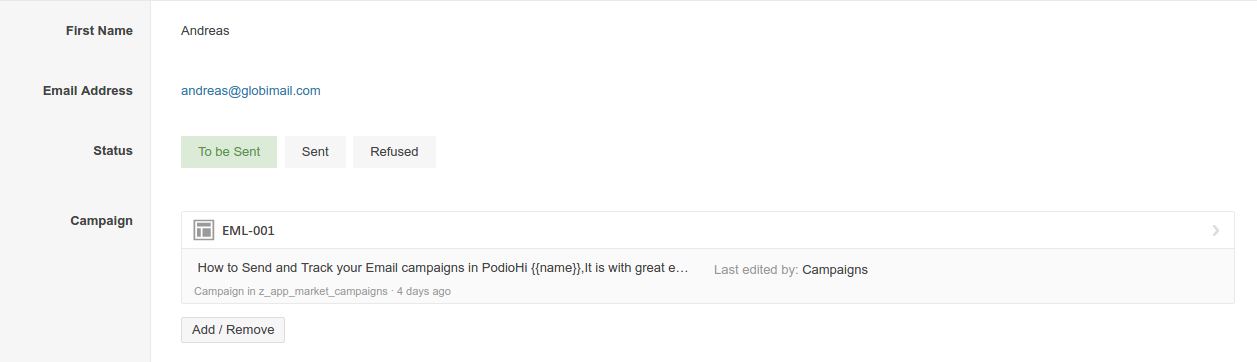
Testing your Campaign
Before sending lots of emails to external contacts, it's always best to test first.
For a quick manual test, just create a new item in the Outbox app with only the required details:
At 15 minutes past the hour, the flow should kick in an queue the email, and within a few minutes from there, you should receive the test email.

This email will be logged as a comment on the Outbox item:
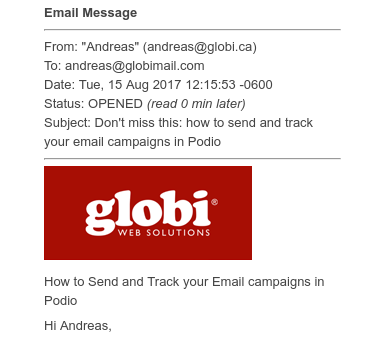
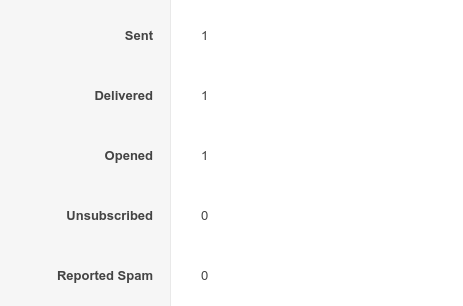
You can also verify that the campaign is tracking deliveries and opens:
Using a Spreadsheet upload
You can easily create GlobiFlow flows to create items in the Outbox app, and they will be picked up every hour and sent out.
Sometimes though, you may wish to use a manual data source, like a spreadsheet. To create such a spreadsheet, we just need the same columns as we had fields when manually creating the item:

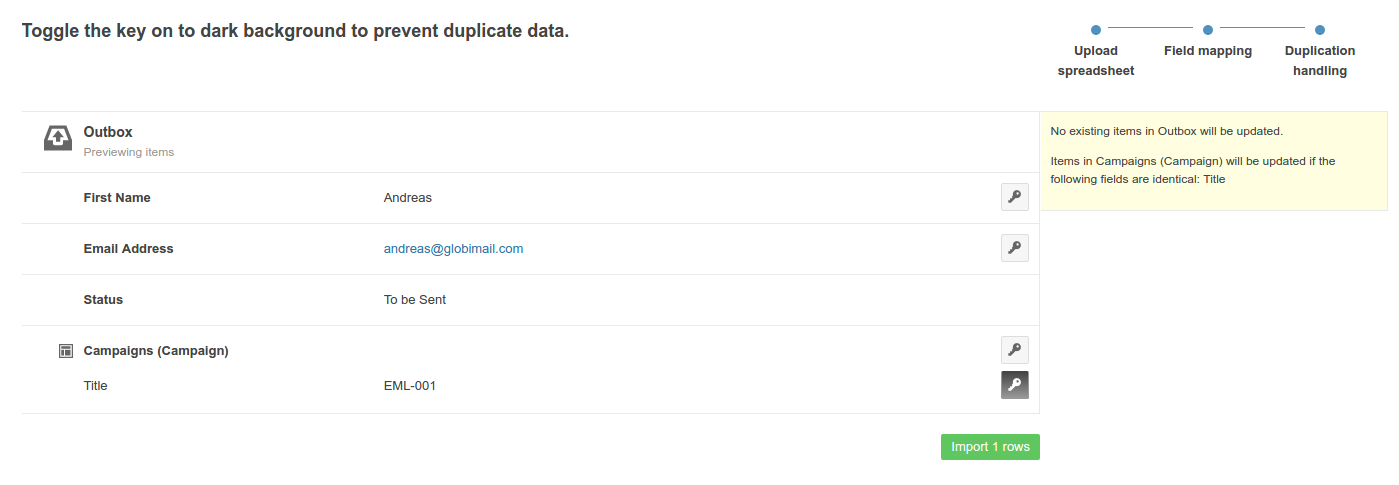
And then import the spreadsheet into the Outbox app in Podio:

After mapping the fields, make sure that you remove the key on the Outbox items so that each row will create a new item in Podio, but it is very important to make sure that there is a key on the Campaign title as you do not want to be creating new items in that app:
Wrap Up
And that's it. You can now create beautiful email campaigns and trigger sending by either creating items in the Outbox app using GlobiFlow, or uploading a spreadsheet into Podio.
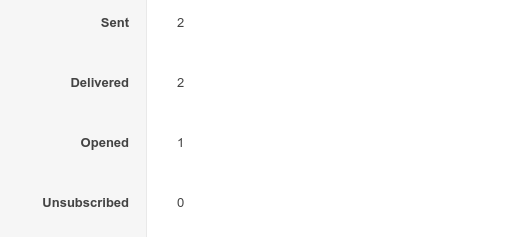
Customers can unsubscribe if they wish, and you can track each campaign's performance:
 by
Andreas Huttenrauch
by
Andreas HuttenrauchOwner of Globi Web Solutions, and Podio Fanatic.
comments powered by Disqus